
Drawing a rose can be a rewarding experience, whether you are a seasoned artist or a beginner. The elegance and beauty of a rose make it a popular subject in the world of art. But if you’re wondering how to draw a rose, fear not! This guide will walk you through each stage of the process, providing tips and techniques to help you capture the perfect rose on paper.
Why Draw a Rose?
Before diving into the technique, let’s quickly discuss why roses are such a popular subject to draw. The rose is often symbolic of love, beauty, and elegance. Its intricate petals, complex structure, and rich symbolism make it an ideal subject for both beginner and advanced artists. Whether you’re creating a botanical illustration or just practicing your drawing skills, knowing how to draw a rose can add a timeless and classic element to your portfolio.
Step 1: Gather Your Supplies
Before starting, make sure you have the proper materials. To learn how to draw a rose, you’ll need:
- Pencils (preferably H, 2B, 4B, and 6B)
- Eraser (preferably a kneaded eraser)
- Paper (preferably a smooth sketching paper)
- Reference image of a rose (you can search for an image to follow)
With your supplies ready, let’s begin!
Step 2: Start with the Center of the Rose
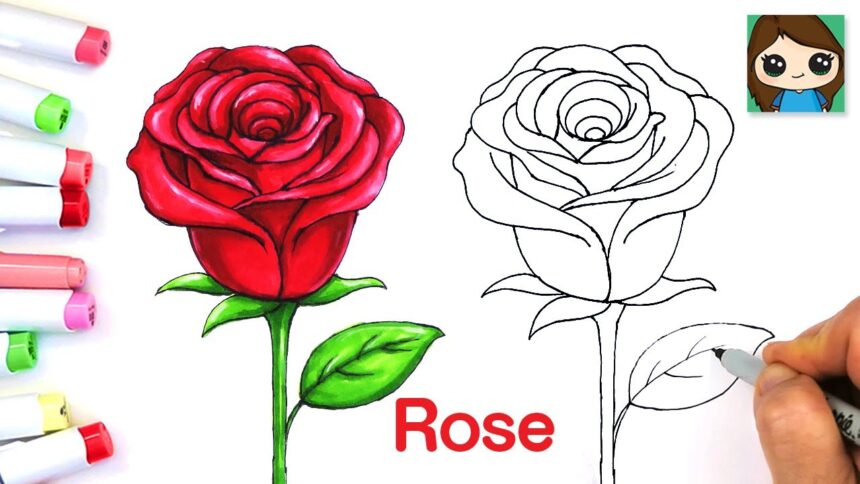
The first step to learn how to draw a rose is to start with the center of the flower. This is where the bloom begins, and it’s important to get this part correct as it serves as the foundation for the rest of the drawing.
- Draw a small spiral shape or oval in the center of your paper. The spiral represents the inner petal.
- Use light, soft lines at this point since you’ll want to make adjustments later.
Step 3: Draw the First Layer of Petals
Once you have the center, the next step in how to draw a rose is to sketch the first layer of petals. The rose petals are slightly curled and overlap each other. You want to give a sense of volume here.
- Draw the first layer of petals surrounding the center. Keep the lines soft and curved to reflect the natural flow of the rose petals.
- Don’t worry about making the petals perfect at this stage; it’s all about getting the general shape right.
Step 4: Add More Petals to the Rose
As you progress with learning how to draw a rose, you will need to add more layers of petals. The petals become larger and more spread out as you move outward from the center.
- Draw additional petal layers around the initial ones. These petals should curve outward and slightly overlap the previous layer.
- The petals should be uneven and irregular, as no two petals of a rose are exactly alike.
- Make sure that the petals have a sense of movement and flow, as this will add realism to your rose.
Step 5: Begin Detailing the Petals
Once you have the basic shapes of your rose petals in place, the next step is to start adding more detailed elements to make your rose more realistic.
- Use a softer pencil, like 2B or 4B, to darken the edges of the petals. The outer edges of the petals are typically darker than the inner parts.
- Add gentle shading to give the petals a three-dimensional look. Focus on areas where the petals curl inwards, as these areas tend to be in shadow.
- Use your eraser to gently lift highlights on the petals, particularly on the edges that catch the light.
At this point, you should begin to see your rose taking shape!
Step 6: Draw the Stem and Leaves
The next part of how to draw a rose is to include the stem and leaves. The stem is usually long and thin, and the leaves are jagged with a sharp outline.
- Begin by drawing the stem coming down from the base of your rose. The stem can be straight or slightly curved, depending on the reference image you’re using.
- Add leaves to the stem. Rose leaves typically have a jagged, serrated edge and come in pairs. Draw several leaves along the stem, making sure to vary their sizes and angles.
Use a 2B or 4B pencil for shading the leaves and stem, giving them texture and depth. The veins of the leaves should be drawn lightly to add more detail to your drawing.
Step 7: Final Touches and Shading
At this stage of learning how to draw a rose, it’s time to add the finishing touches. Here are some tips for completing your rose:
- Enhance the shadows around the base of the petals and between each layer to create depth.
- Use your kneaded eraser to gently lighten any areas of the petals that need highlights or where light hits.
- Add more texture to the stem and leaves with soft shading.
- Review the entire drawing to ensure that the shape of the rose is balanced and that the shading is consistent.
Now that you’ve followed all the steps, step back and admire your work! You’ve learned how to draw a rose with a few simple steps.

Frequently Asked Questions (FAQs)
1. How long does it take to learn how to draw a rose?
The time it takes to learn how to draw a rose depends on your skill level and how detailed you want your drawing to be. A basic sketch could take 30 minutes, while a more detailed and realistic rose could take a few hours. It’s important to practice regularly to improve.
2. Can I draw a rose without using a reference?
While it’s possible to draw a rose without a reference, it’s recommended to have one, especially if you’re a beginner. A reference image will help you understand the structure and proportions of the rose better.
3. What is the best pencil to use when learning how to draw a rose?
For beginners, it’s best to use a range of pencils. A hard pencil (H or 2H) is good for light outlines, while softer pencils (2B, 4B, or 6B) are perfect for shading and adding depth to your rose.
4. Should I focus on symmetry when drawing a rose?
Roses are naturally asymmetrical, so it’s not necessary to focus too much on perfect symmetry. Instead, focus on capturing the organic, flowing nature of the petals and leaves.
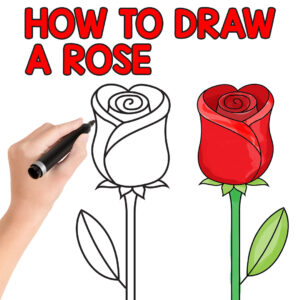
5. How do I add color to my rose drawing?
Once your rose is complete, you can add color with colored pencils, watercolors, or markers. Start by lightly layering the colors and build them up gradually. Pay attention to light and shadow to create a realistic effect.
6. What is the hardest part of drawing a rose?
The hardest part of learning how to draw a rose is often capturing the delicate curves and intricate details of the petals. It takes patience and practice, but with time, you’ll improve your technique.
7. Can I use digital tools to draw a rose?
Yes, you can use digital tools such as a tablet or drawing software to create a rose drawing. The process is quite similar to traditional methods, but you’ll have more flexibility in terms of undoing mistakes and adding color.
Conclusion
Learning how to draw a rose can be both fun and challenging, but with patience and practice, you can master the art of creating a beautiful rose on paper. From starting with the center and working your way outward, to adding delicate shading and details, each step helps bring your rose to life. Remember, every drawing is an opportunity to improve, so don’t be discouraged if your first few attempts aren’t perfect.
By following this guide and practicing regularly, you’ll soon be able to draw stunning roses that will impress anyone who sees them. Happy drawing!
Learn how to draw a rose with this step-by-step guide. From basic sketches to intricate details, discover helpful tips and techniques.