A Moment of Realization
It was a typical Monday morning. I popped my AirPods into my ears, ready for a podcast during my walk to work. But something felt off—the sound from the left side was muffled. I took it out, gave it a quick glance, and saw something I hadn’t noticed before: the tiny mesh was covered in grime and earwax. That’s when I realized I had no idea how to clean AirPods properly.
I had owned them for over a year. I used them every day—for calls, workouts, music. But not once had I thought about cleaning them. That morning kicked off my journey into learning the right way to clean AirPods without causing damage.
Whether you’ve had your AirPods for months or just bought a new pair, knowing how to clean AirPods is crucial. Clean AirPods don’t just look better—they work better too. Let’s walk through how you can keep your AirPods as fresh as the day you bought them.
Why Cleaning Your AirPods Is So Important
AirPods go everywhere with us: the gym, crowded commutes, airplanes, parks, even the bathroom. All that exposure means they collect earwax, dirt, sweat, dust, and bacteria. This buildup can affect sound quality and, worse, lead to ear infections.
More importantly, gunk in the speaker mesh can muffle your audio. If you’re turning the volume up higher than usual or feeling discomfort in your ears, it might be time for a cleaning. Knowing how to clean AirPods properly not only extends their lifespan—it protects your ears too.
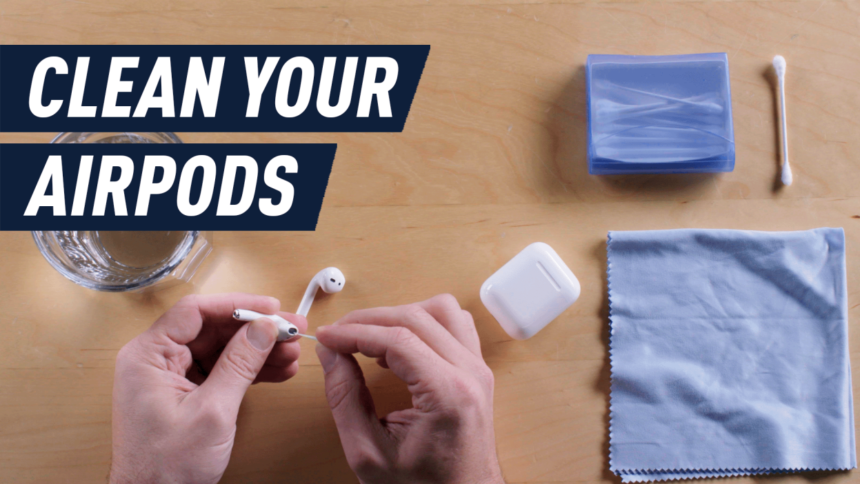
Tools You’ll Need to Clean Your AirPods
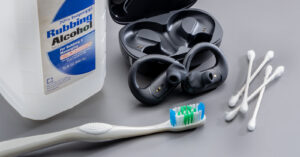
Cleaning your AirPods doesn’t require fancy gear. In fact, most of what you need is probably already in your home. Here’s what you should gather before getting started:
-
A microfiber cloth
-
A soft-bristled brush (like a clean, dry toothbrush)
-
A wooden toothpick (optional)
-
Cotton swabs
-
70% isopropyl alcohol (optional)
-
A flashlight or desk lamp (for visibility)
These tools help clean your AirPods effectively without damaging any sensitive parts.

Step-by-Step Guide: How to Clean AirPods Safely
1. Wipe the Outer Shell
Use your microfiber cloth to gently wipe down the outer surface of each AirPod. This will remove fingerprints, skin oils, and light dust. For more stubborn marks, lightly dampen a corner of the cloth with a small amount of isopropyl alcohol.
Be careful not to let any liquid enter the speaker or microphone holes.
2. Clean the Speaker Mesh (Where the Sound Comes Out)
This is often the dirtiest part. Turn on your flashlight and inspect the mesh. Use the soft-bristled brush to gently sweep away any visible dirt or wax. Brush in one direction, not back and forth, to avoid pushing debris deeper.
If there’s still buildup, gently scrape the edges with a wooden toothpick—gently being the key word here. Don’t poke or press too hard, or you could damage the delicate mesh underneath.
3. Tidy Up the Small Crevices
Use a dry cotton swab to clean around the seams and curves of the AirPods. If there’s any sticky residue, lightly moisten the swab with isopropyl alcohol. Make sure the swab is only slightly damp, not wet.
Let everything air-dry completely before placing the AirPods back into the case.
How to Clean the Charging Case
The AirPods case also needs regular cleaning, especially the inside where the buds rest. Dust and debris here can affect charging.
-
Outside: Wipe the outer shell with your microfiber cloth. A dab of isopropyl alcohol can help with grime or scuffs.
-
Inside the case: Use a dry cotton swab to clean the charging wells. Don’t use anything sharp or wet.
-
Charging port: Blow gently to remove dust or use a soft brush. Avoid inserting objects.
Keep your case clean, and your AirPods will charge more efficiently and stay protected.
How Often Should You Clean Your AirPods?
A light cleaning once a week is ideal, especially if you use your AirPods daily. A more thorough cleaning, like what we just walked through, should be done once or twice a month.
If you sweat a lot while wearing them or use them in dusty environments, consider cleaning them more frequently. It only takes a few minutes but makes a world of difference.
One Time I Almost Ruined My AirPods
I’ll admit it: before I knew better, I tried cleaning my AirPods with a toothpick and a wet paper towel. Not only did I push the wax further into the mesh, but I also left moisture near the microphone. They stopped working for a whole day, and I thought I’d broken them for good.
Luckily, after letting them dry overnight and brushing them out again—this time properly—they came back to life. That mistake taught me an important lesson: always use the right tools and techniques when cleaning electronics.
Heading: How to Clean AirPods Without Causing Damage
To avoid damaging your AirPods while cleaning:
-
Avoid water or soaking. They’re not waterproof, even if they’re sweat-resistant.
-
Never use metal tools. These can scratch or tear the speaker mesh.
-
Don’t use compressed air. It may force dirt deeper or damage internal components.
-
Let them dry fully. Never use your AirPods until all parts are completely dry.
Cleaning should be gentle, never aggressive. Think of it like brushing your teeth—regular care keeps everything working better for longer.
Final Thoughts: Make It a Habit
Learning how to clean AirPods might seem like a small detail, but it has a big impact on your listening experience and your health. Clean AirPods not only sound better—they last longer, feel more comfortable, and look like new.
So next time your music sounds off, don’t rush to replace your AirPods. Check them first. A few minutes of cleaning could bring them right back to life.
Meta Description:
Discover how to clean AirPods easily and safely at home. Follow this simple guide to keep your AirPods clear, hygienic, and sounding their best.