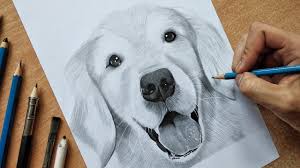
When my little sister Emily turned seven, all she wanted was a puppy. But since we lived in a small apartment and couldn’t have pets, I decided to give her something different: a drawing of her very own dog. The only problem was, I didn’t know how to draw a dog myself. So, I set out on a mission to learn. That’s where this guide begins—not just with instructions, but with a story and a journey that anyone can take.
If you’ve ever asked yourself how to draw a dog, you’re not alone. Whether you want to draw your pet, create your own cartoon pup, or simply try something new, learning how to draw animals can be both relaxing and rewarding. The trick is to break the dog into simple shapes and add details step by step. Even if you’ve never drawn before, you can follow along.
The process of understanding how to draw a dog is more than learning lines and shapes—it’s about expressing creativity, observing the world, and growing confident in your skills. So grab a pencil, a piece of paper, and let’s get started.
Step 1: Start with the Basic Shapes
Every good drawing starts with a rough sketch. Begin by drawing a circle for the dog’s head and a large oval beneath it for the body. Don’t worry about getting the shapes perfect—these are just your guide marks. Connect the head and body with two short lines for the neck. Next, lightly draw a vertical line through the center of the head and a horizontal line across it. These help position the eyes and nose.
Step 2: Sketch the Face
Using your guide lines, draw two small circles for the eyes. Just below the center line, draw an oval or triangle for the nose. From the nose, sketch a short vertical line down and curve it into a smiling mouth. Add ears—these can be triangle-shaped for a German shepherd look or long and floppy for a beagle. Don’t forget to add a little tongue or a spot around one eye if you want to give your dog personality.
Step 3: Add the Legs and Tail
Using straight or slightly curved lines, sketch the front legs coming down from the body oval. Add a curve for the back and draw the hind legs folded or straight depending on whether your dog is sitting or standing. Then, draw the tail at the back—it can be long, short, curled, or wagging. The beauty of drawing dogs is that no two need to look the same.
Step 4: Outline and Shape the Dog
Now it’s time to go over your light sketch with more confident lines. Follow the shapes you drew, but round them out. Make the body a little fluffy, the legs thicker at the top and thinner at the paws. Adjust the head shape if needed. Erase the original guide lines carefully. This is where your dog begins to look more real.
Heading: Learning How to Draw a Dog with Confidence
The first time I tried to draw a dog, it looked more like a lopsided sheep. But with a little patience, I figured out that anyone can learn how to draw a dog—not by aiming for perfection, but by building confidence with every line. Just like learning to ride a bike, it’s okay to wobble in the beginning.
Step 5: Add Texture and Details
Want to make your dog drawing stand out? Add fur details with short, soft pencil strokes. Around the neck and chest, make the fur a little thicker. You can shade around the eyes and under the belly to give your dog depth. If your dog has spots or patterns, now’s the time to draw them in. You can also sketch a collar, tag, or even a small ball nearby.
Step 6: Color It In
If you have colored pencils, markers, or crayons, bring your dog to life with color. Golden brown for a Labrador, black and white for a Dalmatian, or maybe even purple if you’re feeling imaginative! Fill in the nose, eyes, and fur gently. You can add a blue sky, green grass, or even a doghouse in the background.
A Short Story to Inspire Your Drawing
Let me tell you about Mia, a girl in my art class. She loved dogs but struggled with drawing. Her first few attempts didn’t look right—the ears were uneven, the legs too long. But she didn’t give up. Every day after school, Mia practiced one dog part at a time: just ears one day, paws the next. Within weeks, she drew a beautiful golden retriever with such emotion that it looked like it might bark. That moment taught us all a lesson: effort matters more than talent.
Tips for Beginners
-
Use light lines first. It makes erasing easier.
-
Look at real dogs or photos. This helps with body shape and posture.
-
Break it down into steps. Don’t try to draw everything at once.
-
Be creative. Make your dog happy, sleepy, playful—anything you like.
-
Practice often. The more dogs you draw, the better you’ll become.
Finishing Touches and Proud Moments
Once your drawing is complete, sign your name at the bottom. Hang it on your wall or give it to someone who loves dogs. Drawing isn’t just about art—it’s about connection, creativity, and confidence. Whether your dog is simple or detailed, you created something unique.
And remember: the best artists aren’t the ones who draw perfectly. They’re the ones who keep drawing, keep learning, and keep having fun.
Conclusion: Drawing Dogs is for Everyone
Now you know how to draw a dog, from the first circle to the final flourish. You’ve learned how to build a drawing from shapes, how to add personality, and most importantly, how to enjoy the process. Drawing a dog may seem small, but it opens a door to creativity that can take you anywhere.
So keep your pencils ready and your imagination wide open. Today it’s a dog—tomorrow, who knows? Maybe a whole zoo. Dog is symbol of loyality.
Meta Description:
Discover how to draw a dog with this easy step-by-step guide for beginners. Learn simple techniques, creative tips, and enjoy a fun story to inspire your drawing journey.


