
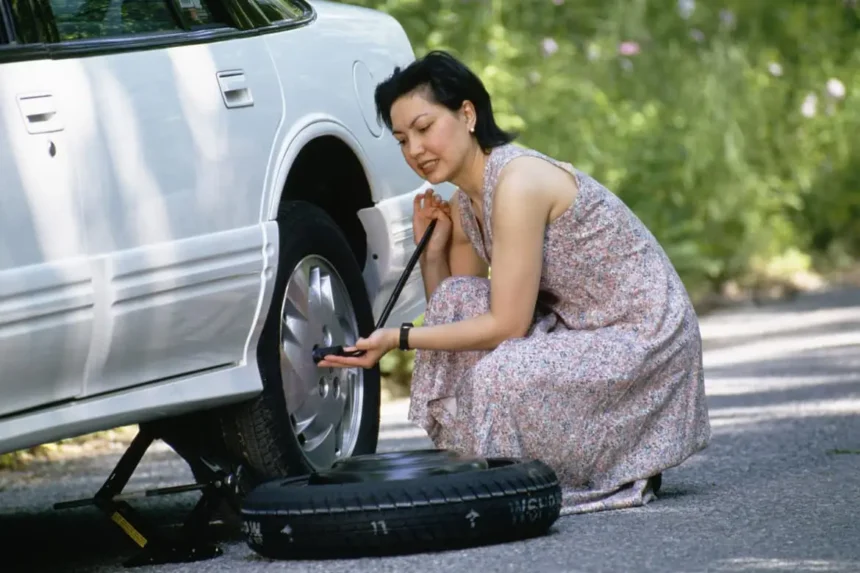
It was a chilly morning when Emma heard the unmistakable flapping sound as she drove to work. At first, she hoped it was something on the road. But a quick glance in the mirror confirmed it—her rear tire was completely flat. She had never done it before, but that day she learned how to change a tire.
Like Emma, many people find themselves in unexpected situations. And while it’s tempting to call for roadside assistance, sometimes help is far away—or your phone is out of signal. That’s why knowing how to change a tireis more than just a useful skill; it’s essential for any driver.
Fortunately, learning how to change a tire is easier than it seems. With a little patience and the right tools, you can get back on the road in under 30 minutes. Let’s walk through everything you need to know.
Why You Should Know How to Change a Tire
Flat tires can happen at the worst times—on a road trip, late at night, or during a busy workday. In those moments, being able to fix the problem yourself can save you time, money, and stress. Additionally, it gives you confidence as a driver, knowing you’re not completely dependent on others.
Although calling for professional help is sometimes necessary, many flats can be handled with a basic spare tire and a little elbow grease.
Gather Your Tools First
Before you ever get a flat, make sure your vehicle is stocked with the essentials. Having the right gear ahead of time will make the entire process smoother. You’ll need:
-
A spare tire (inflated and undamaged)
-
A car jack
-
A lug wrench
-
Wheel wedges or bricks
-
A flashlight (with extra batteries)
-
Reflective triangles or flares
-
Gloves and a towel (optional but useful)
-
Your vehicle’s manual
Make sure these items are stored in an easy-to-reach place, usually the trunk or beneath the cargo floor.
Step-by-Step Instructions on How to Change a Tire
1. Pull Over to a Safe Spot
As soon as you feel the car pulling to one side or hear a thumping sound, slow down and look for a safe place to stop. It should be flat, stable, and away from traffic. Turn on your hazard lights to alert other drivers.
Once you’ve stopped, apply the parking brake and place wheel wedges behind the tires opposite the flat one. This helps prevent the car from moving while you’re working.
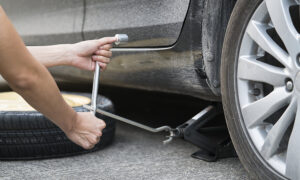
2. Loosen the Lug Nuts
Use your lug wrench to loosen the lug nuts on the flat tire. Turn them counterclockwise. Don’t remove them yet—just break their tight grip while the car is still on the ground. This step might take some effort, especially if the bolts are tight or rusty.
3. Lift the Vehicle
Next, place your jack beneath the vehicle at the recommended lifting point. Check your car manual to be sure of the exact spot. Slowly raise the car until the flat tire is about six inches off the ground. Always keep your body away from underneath the vehicle for safety.
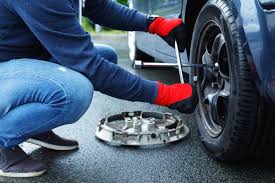
4. Remove the Flat Tire
Now, remove the lug nuts entirely and keep them in a safe spot—inside a hubcap works great. Gently pull the flat tire straight toward you until it’s off the bolts. Set it flat on the ground so it won’t roll away.
5. Mount the Spare
Line up the spare tire with the bolts and slide it into position. Once it’s secure, screw the lug nuts back on by hand as tightly as possible.
One Crucial Step You Can’t Skip
6. Lower the Car and Tighten the Lug Nuts
Carefully lower the car until the spare tire is touching the ground. Then, remove the jack completely. Using your lug wrench, tighten the nuts in a star-shaped pattern. This ensures the pressure is evenly distributed across the wheel.
Repeat the pattern once more to make sure each lug nut is firm. It’s better to double-check now than deal with a loose wheel later.
After the Tire Change: What’s Next?
Although your car is now drivable, your journey isn’t quite over. Most spare tires—especially compact ones—are not built for high speeds or long distances. Therefore:
-
Keep your speed under 50 mph
-
Avoid highways if possible
-
Head directly to a mechanic or tire shop
-
Replace or repair your damaged tire promptly
Don’t forget to return all your tools and the flat tire to your car. Also, take note if your spare was used—it should be checked or replaced soon.
When You Should NOT Change the Tire Yourself
Although it’s helpful to know how to change a tire, some situations make it too risky:
-
If you’re on a narrow shoulder with high-speed traffic nearby
-
If it’s dark and you don’t have proper visibility or lights
-
If the tire is damaged in a way that affects more than just the rubber
-
If you’re physically unable to lift or operate the tools
In these cases, calling for professional help is the safest and wisest option.
Practice Makes Perfect
Like any skill, changing a tire gets easier with experience. If you’ve never done it before, consider practicing in your driveway or garage. Go through the motions: remove the spare, use the jack, and even try loosening and tightening the bolts.
Even though it might seem unnecessary now, being familiar with the process ahead of time will make a huge difference if you ever find yourself in a real situation.
Final Thoughts
Emma didn’t expect her morning commute to turn into a roadside repair session. But because she stayed calm and followed each step, she went from feeling helpless to feeling capable. Now, she confidently tells friends that knowing how to change a tire is one of the best skills she’s ever learned.
So, if you’ve never tried it, now is the time to prepare. Keep your tools ready, know the steps, and practice when you can. You never know when that knowledge might turn a stressful moment into a simple fix.
Need to fix a flat on your own? Learn how to change a tire with this step-by-step guide. Easy to follow, even for beginners—get back on the road safely and quickly.