
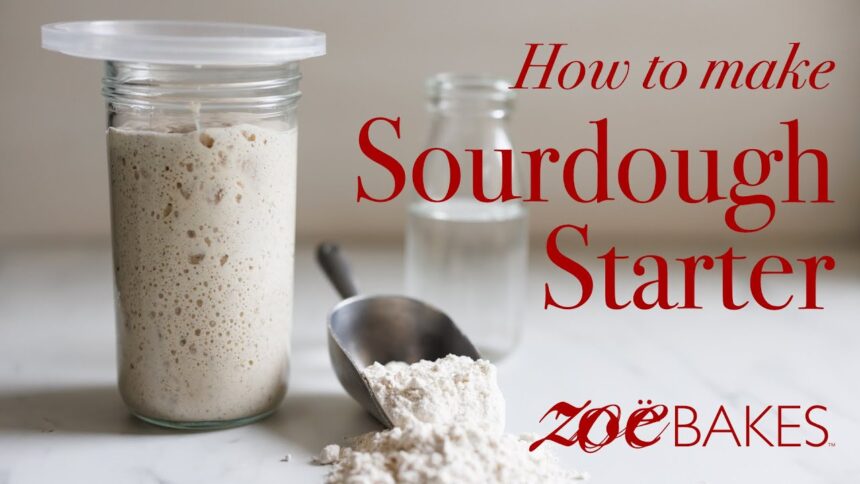
It started with a craving. Not just for bread, but for something deeper—richer, more real. During a rainy weekend stuck indoors, I opened a dusty cookbook, flipped through the pages, and paused at a rustic loaf of golden, blistered sourdough. That was the spark. The very next day, I decided to learn how to make sourdough starter—and with that, I began a journey into the world of wild fermentation.
Creating your own sourdough starter is like growing a tiny kitchen companion. It may seem intimidating at first, but don’t worry. You don’t need any special equipment, and you won’t need to hunt down hard-to-find ingredients. In fact, the entire process begins with just two things you probably already have: flour and water.
If you’re wondering how this simple mixture can rise dough and transform flavor, you’re in the right place. In this guide, I’ll walk you through how to make sourdough starter in a way that’s easy to follow, beginner-friendly, and rooted in real-life experience.
Why Sourdough Starter Matters
Before we dive into the steps, let’s take a moment to understand what a sourdough starter actually is. In short, it’s a living culture of wild yeast and bacteria that naturally ferments flour and water. Unlike commercial yeast, which is a single strain, sourdough starter contains a whole ecosystem. This not only gives your bread a more complex taste, but also makes it easier to digest and more shelf-stable.
Once you’ve mastered how to make sourdough starter, you’ll have an endless supply of natural leavening. That means you can bake without ever buying yeast again. But more than that, you’ll be participating in one of the oldest traditions in the world—breadmaking with wild fermentation.
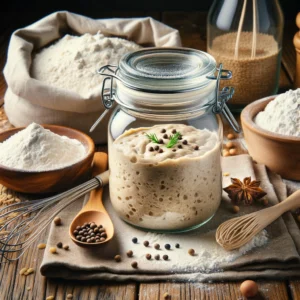
What You’ll Need to Get Started
The good news is that you don’t need to buy anything fancy. Here’s all you’ll need:
-
Flour – Whole wheat flour is great to start with, then switch to all-purpose.
-
Water – Filtered or dechlorinated water is best.
-
A jar or container – Glass or plastic both work.
-
A spoon or spatula – For mixing.
-
Cloth or paper cover – Something breathable like a tea towel or coffee filter.
-
A rubber band – Optional, but helpful to track growth.
Now that you’ve gathered your supplies, it’s time to get started.
The Sourdough Starter Schedule
Day 1: The First Mix
To begin, combine:
-
½ cup whole wheat flour
-
¼ cup lukewarm filtered water
Stir well until there are no dry spots. The consistency should be thick but stirrable—like pancake batter. Scrape down the sides of the jar, cover it loosely with a breathable cloth, and let it sit at room temperature (ideally 70–75°F).
At this point, you’ve already started your sourdough adventure.
Day 2: Checking for Life
After 24 hours, you may or may not see activity. A few bubbles or a faint sour smell are great signs, but don’t worry if nothing’s happening yet. Microbes are at work, even if you can’t see them.
Now, discard half the mixture (about ½ cup), and feed it with:
-
½ cup all-purpose flour
-
¼ cup water
Mix well, cover again, and let it rest.
Day 3: The Funk Begins
By the third day, your starter might smell a bit odd—like sour fruit, cheese, or even nail polish. That’s normal! It means wild bacteria and yeast are finding their place.
Once again, discard half and feed with the same ratio of flour and water.
At this stage, you’re starting to learn how to make sourdough starter by observing it daily. You’re building a rhythm, which is key to success.
Days 4–6: Watch It Rise
This is when things get exciting. Your starter should now be showing more signs of life—bubbles, a slightly domed top, and even rising a bit after feeding. If you mark the jar with a rubber band after feeding, you might see it double in size within hours.
Stick to the same routine:
-
Discard half.
-
Feed with equal parts flour and water.
-
Stir and rest at room temperature.
Transitioning from whole wheat to all-purpose flour helps balance your starter, though some bakers continue with a blend. Either way, consistency is more important than perfection.
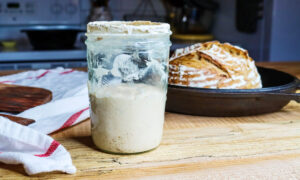
When Is It Ready?
You’ll know your starter is ready when it:
-
Doubles in size within 4 to 6 hours of feeding
-
Smells pleasantly sour
-
Has a bubbly, airy texture
To be sure, perform the “float test.” Drop a teaspoon of starter into a glass of water. If it floats, it’s airy and active—ready to bake.
If it sinks, don’t worry. Just keep feeding for a few more days and test again. Sourdough doesn’t like to be rushed, and that’s part of its charm.
Heading: How to Make Sourdough Starter Last Forever
Once your starter is established, maintaining it is simple. You have two options:
Option 1: Keep it on the counter
Feed it once daily with equal parts flour and water. This works well if you bake often.
Option 2: Store it in the fridge
If you’re not baking daily, place your starter in the fridge. Feed it once a week, then bring it to room temperature and feed it again before baking.
Remember, the more you feed and use your starter, the stronger and more flavorful it becomes.
Tips and Troubleshooting
Even if you’re following every step, you might hit a few bumps. Here’s how to deal with them:
-
Too thick or too runny? Adjust your flour or water slightly to get a pancake batter-like consistency.
-
Odd smell? Funky odors early on are normal. If it smells rotten or has mold, throw it out and start over.
-
No rise? Try a warmer spot, or switch back to whole wheat flour for a few feedings.
Baking teaches patience. And once you know how to make sourdough starter, you’ll also know that good bread takes time.
Beyond Bread
Now that you’ve made your starter, the fun is just beginning. Besides crusty loaves, you can use your discard in pancakes, muffins, crackers, and even chocolate cake. Sourdough isn’t just for bread—it’s a lifestyle, a hobby, and in some ways, a tiny science project you get to eat.
Final Thoughts
Learning how to make sourdough starter is a mix of science, tradition, and a bit of everyday magic. What starts as flour and water turns into something alive—something that feeds your creativity as well as your appetite.
It may take a few tries. It may test your patience. But when you pull your first loaf from the oven, with its crackling crust and soft, tangy interior, you’ll know it was worth every stir, every wait, and every bubbling moment in that jar.
Meta Description:
Discover how to make sourdough starter at home using just flour and water. This simple, step-by-step guide will help you create a thriving starter from scratch—even if you’re brand new to baking.